
Configure Your Workflow
Before we get into how you can configure your workflow, let's talk about its basic structure.
You can see that your workflow has a Select Trigger and an End activity by default. It's important to note that every workflow must have a trigger. This is because every workflow must have a trigger or event that sets it off. For example, you could have workflows that get triggered only when a specific value crosses a configured threshold.
Having an End activity, however, is optional, because not all workflows end in a task that completes the flow. For example, you can easily create a workflow that monitors a system and performs remedial tasks when triggered, and resumes monitoring once the tasks are done. On the other hand, you could have a workflow that approves or rejects a request. Once the process is complete, and the workflow has sent an output, it exits.
In our case, we're going to create a simple workflow that uses a preconfigured REST service trigger. We shall then add a text response to the REST service. When you deploy the application, the workflow outputs the configured text response to the trigger REST service. The workflow then exits.
Configuring this workflow involves the following tasks:
Set up the REST Service trigger.
Add and configure the Response activity.
1. Set Up the REST Service Trigger
Click Select Trigger in the Canvas area of the Workflow Builder. The Select a Trigger modal appears.
Select the RESTService trigger and click Save. The RESTService activity is added to the workflow, and the Configure RestService panel appears in the lower half of the page.
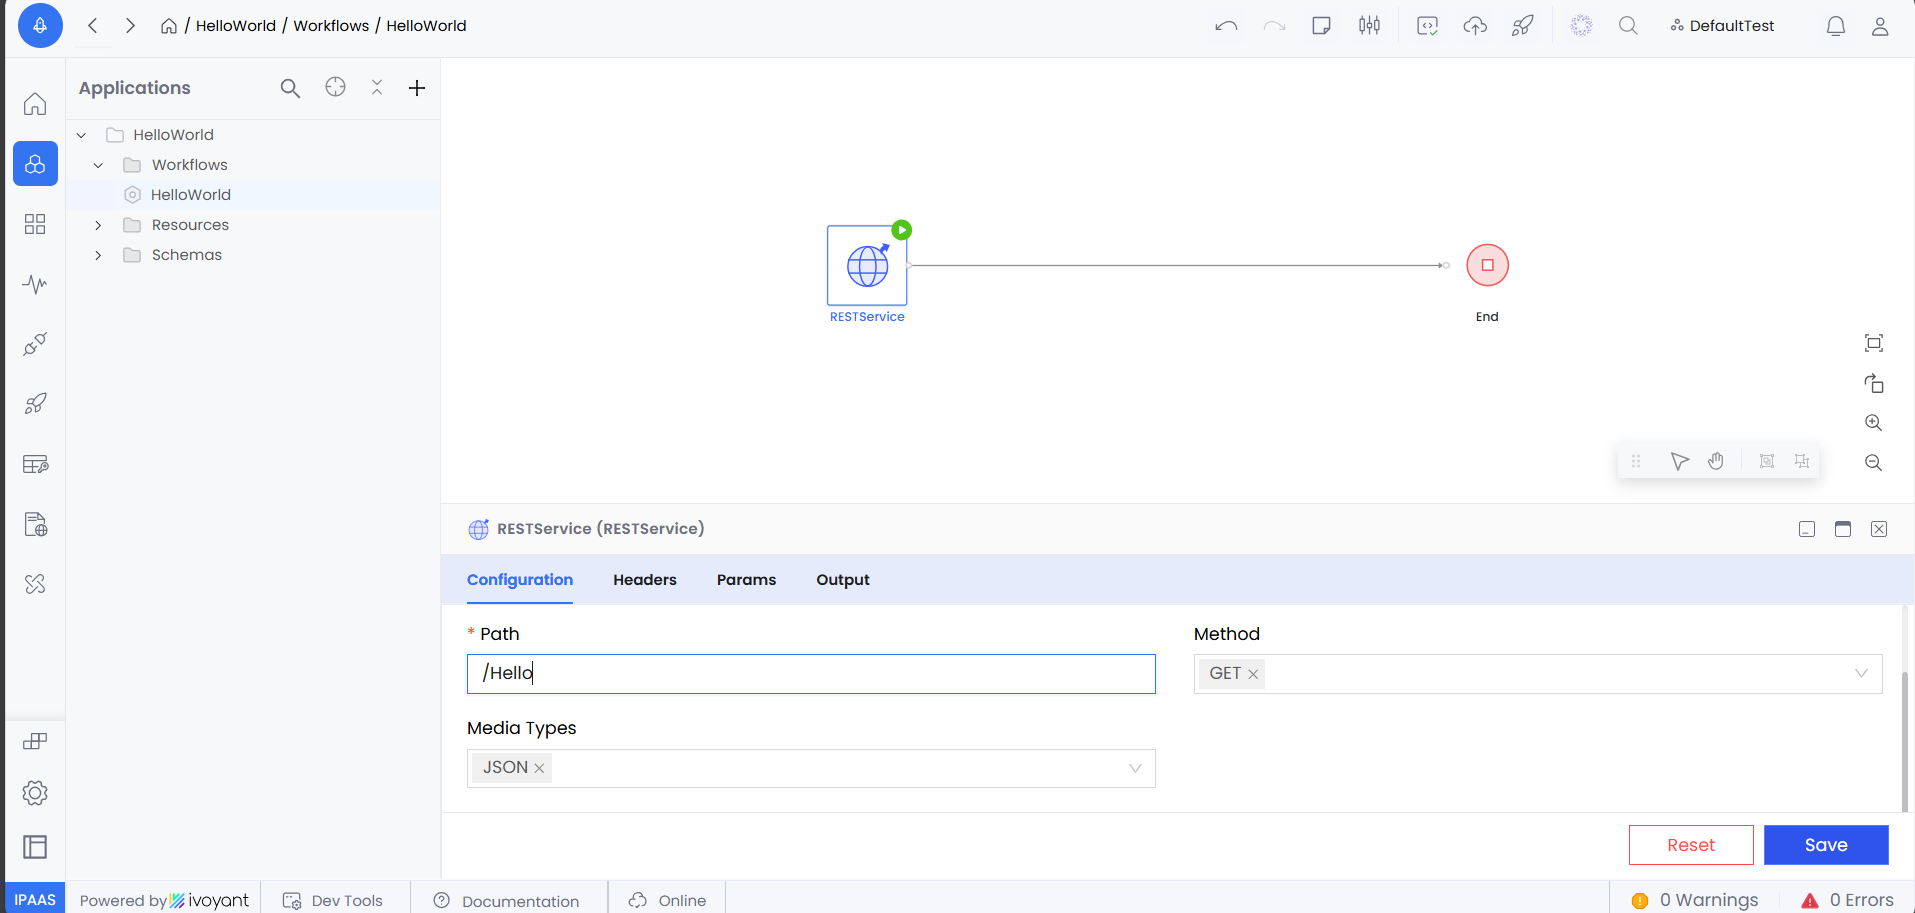
In the RESTService Configuration panel, click Configure It Yourself. The RESTService Configuration options appear.

In the Configuration tab, enter the Path of the REST service as /Hello. Leave the other fields unchanged.
Click Save.
You've now added a REST service to your workflow and specified the path to the service. You must now add a Response activity to your workflow, so it can automatically respond in a predictable manner when it receives an input from the REST source.
2. Add and Configure the Response Activity
To add the Response activity:
Navigate to the Activity tab on the left sidebar menu.
Click to expand the Common folder.
Drag and drop the Response activity between the RESTService and the End activities on the Workflow Builder canvas. The Response activity is now added to your workflow, and you can see that the RESTService activity connects to the Response activity, which now connects to the End activity. Also, because the Response activity is selected, its configuration options appear in the Response panel in the lower half of the page.
If the Response activity is not selected in the canvas, click it to display its configuration options.
Click on the Input tab of the Response activity to configure it.
You may want to click the Full-Screen View ![]() icon in the top-right corner of the configuration options panel, to ensure you have enough space to perform the tasks that follow.
icon in the top-right corner of the configuration options panel, to ensure you have enough space to perform the tasks that follow.
In the Source panel, scroll down to the RestService > body node, and you can see that this node is empty. In the simplest of terms, this means that the body element in the REST service output is empty. We shall now configure the Response activity to add a text message to the body, so that the workflow can output the message in response to the trigger from the Rest service.
To add new elements to the body element of the REST input, you must first extend the body to include a schema that contains a message element. You can then add the text that you want to the message element.
In the Target panel, hover over the body object and click on the ellipsis (⋯) adjacent to it.
From the context menu that appears, select Extend to select the schema that you want to use to extend the content in the body node. The Add a Schema modal appears.
Click Search Registry and search and select the Message schema.
Click Import to import the schema under the body node. The modal exits, and the display returns to the Response activity input settings.
Expand the body object. You can now see that it has a
messagechild node.Click message node and then click on the row adjacent to it in the Mapping Expressions panel. You will notice it changes into a text field. In this text field, enter the message,
"Hello World".Click Save to apply the configuration.
Now, when the Response activity in your workflow receives inputs from the RESTService activity, it shall add the Message schema to the body node of the content received and update the message node in the newly added schema to "Hello World". It shall then send out this output.
All you need to do now is publish, deploy, and test the workflow.
Last updated
Was this helpful?